And once again I am being bombarded with e-mails asking me to help them install ATI drivers under the latest openSUSE 10.3. Make sure that you do follow and understand the how-to and go through it completely … besides I am not guarantying that this will 100% work with your PC configuration … this is what I came up with from my past experience and has worked on several configurations.
Before we start (as of writing this how-to - 11.10.07): We all know about the 1-click install that new openSUSE 10.3 has, but unfortunately if you use this ATI 1-click Driver Installer link, you end up installing the latest 8.41 driver which only has support for the new Radeon HD video cards (HD 2xxx series) and thus we will need to install the older 8.40 driver manually for older cards. Expect the later drivers to work with all cards and hopefully making 1-click install really worthy it’s name for installing ATI drivers. So if you have them RadeonHD card then try 1-click install, as I can’t try it out myself.

I am running openSUSE 10.3 x86_64 platform (AMD64), with ATI Radeon X800 GTO2 PCI-E interface and 22″ 1650×1080 resolution on DFI nForce4 Ultra based motherboard (sad, but from my last 10.2 installation I haven’t upgraded my computer).
Driver used here: 8.40.4
IMPORTANT: Please check for any UPDATES at the end of this blog before continuing.
Once again there are prerequisites before you begin installing the drivers. You will need to have the following installed. All these can be found on your openSUSE 10.3 DVD or main repository:
1. kernel-source 2. kernel-syms 3.gcc 4. make
Also make sure that the followings are installed, which are usually installed with default installation (just to make sure)
- compat-32bit
- qt3-32bit
- libstdc++-32bit (plus -devel packages)
- compat-libstdc++
- libgcc
- xorg-x11-libs-32bit (plus -devel packages)
- Mesa-32bit (plus -devel packages)
- fontconfig-32bit (plus -devel packages)
- expat-32bit (plus -devel package)
- freetype2-32bit (plus -devel packages)
- zlib-32bit (plus -devel packages)
- libdrm
- libdrm-32bit
(the list is for x86_64 users, for 32-bit users the same applies but without “-32bit” string in the name for packages)
Info for n00bs/newbies: When you see “~>” it is user prompt and when you see “#“, you have to be root (by typing “su” and supplying the password when asked).
Once the above mentioned packages are installed, let’s prepare the kernel modules. Execute the following commands:
# cd /usr/src/linux–2.6.22.9-0.4 (or the version of kernel you are using, usually the newest available)
# make mrproper
# make cloneconfig
# make modules_prepare
and one last command to clean the kernel source:
# make clean
Also, if you have tried installing drivers before, let’s remove them completely by executing the command:
# rpm -e $(rpm -qa | grep fglrx)
(Just in case, run also Yast Software Manager and search for fglrx and remove all of them)
Now to installing drivers:
1. Download the latest available drivers from ATI Drivers and Software section. Choose your version of drivers: Linux x86 for 32 bit, Linux x86_64 for 64 bit.
2. Once downloaded, copy to a folder that you wont forget. (let’s presume /home/me/ATI)
# cd /home/me/temp
3. Generate distribution specific package:
For 32-bit users:
# sh ./ati-driver-installer-x.xx.x-yy.run –buildpkg SuSE/SUSE102-IA32
(where x.xx.x is the driver version number and yy the architecture)
For 64-bit users:
# sh ./ati-driver-installer-x.xx.x-yy.run –buildpkg SuSE/SUSE102-AMD64
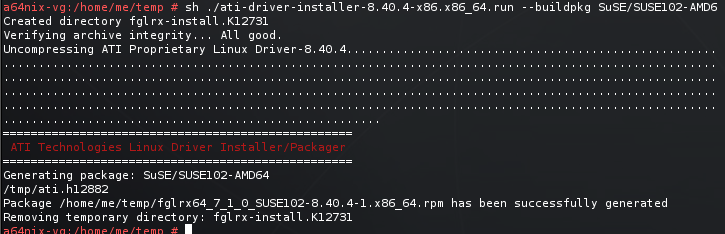
(since driver version 8.40 does not have support for 10.3 we are using the file to generate 10.2 package. Once new drivers are there I will update this step)
4. Now the ATI Driver Installer made a driver package for your system which has to be installed and has been created in:
/usr/src/packages/RPMS/i386
of if you have a 64-bit processor it’s located here.
/usr/src/packages/RPMS/x86_64
Head to the location where installer has been created:
# cd /usr/src/packages/RPMS/x86_64
![]()
(64-bit version is presumed from now onwards for the tutorial (adjust according to your platform))
5. Once there we need to install the rpm package that we compiled:
# rpm -Uvh fglrx*.rpm

and at the end you should have something similar to the following, without any errors:
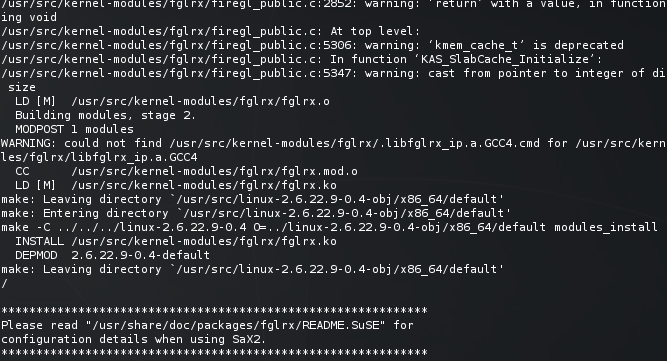
6. Hopefully the above command went well, without any error messaged and the drivers were installed. Now run the following command:
# ldconfig
7. Now we need to leave the cool graphical desktop and switch to console mode by typing (as root):
# init 3
Log-in as root.
8. Last thing left is to configure the X server, to let it know which driver to use for rendering 2D and 3D:
# sax2 -r -m 0=fglrx
Test and then save the configuration. No need to run aticonfig command (at least it works for me)
9. Reboot(!) before you enter your DE (Destop Environenment).
Once rebooted and back to your KDE/Gnome and logged in as user, launch few more commands to verify that all went good and OpenGL is working now at it’s max:
~> fglrxinfo

~> glxinfo
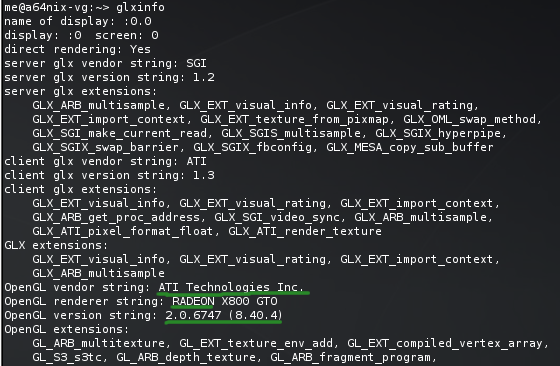
If it states ATI Technologies Inc and the make of your card - excellent. Everything is setup correctly and working flawlessly. Time to relax and have a cup of coffee.
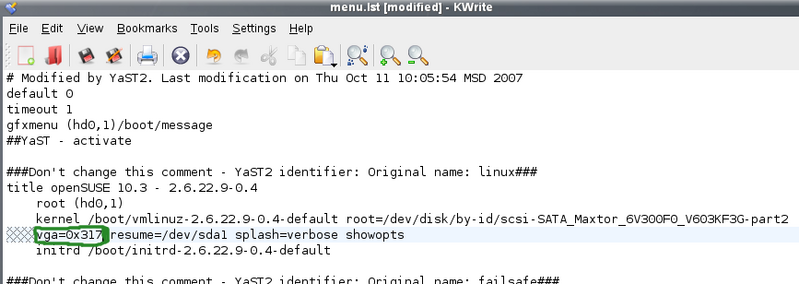
Troubleshooting 1: When running sax2 command and/or when switching to terminal screen you face problem of blank screen (screen going dead), then you should disable framebuffer in the console. For this do the following:
1. Edit /boot/grub/menu.lst and remove the vga=xxx statement from the kernel line.
2. Reboot once you have modified the menu.lst file
3. Rerun the sax2 command mentioned above in step 8
Tip: If you would like to get back your original/higher resolution when in console mode (ex: Ctrl+Alt+F1), once you have installed and rebooted and verified that ATI drivers are in charge for OpenGL, you can re-input the string vga=xxx (in my case as seen above it is 0×317 which is for 1680×1050).
Troubleshooting 2: If you get stuck while installign driver (black screen, not booting DE, etc), reboot and once in grub menu type “init 3″, and once loaded log-in as root and runf the following to load the default drivers:
# sax2 -r -m 0=radeon
With video drivers installed you will notice the quick responsiveness of your GUI and a more pleasant experience. Hey don’t forget that now you can enjoy the 3D desktop ![]()
Also check out the openSUSE.org ATI wiki page, though mine is easier to understand ![]() but you can find more detail their per your needs. Enjoy.
but you can find more detail their per your needs. Enjoy.
Remark: Expect updates for this tutorial once newer drivers are available from ATI/Yasts ATI repository.
Update 17.10.07 :


